Posted in iPads, Learning, Technology

Maths in Motion

My planning this term has been fairly slack given that I’ve been so sick and there’s nothing worse than being sick at home and trying to plan lessons. So, many of my lessons are comprised using the 6-step lesson plan: plan your lesson in the final 6 steps that you take to walk to your classroom!

Today’s Year 4 Digital Technology lesson was meant to be tinkering on Scratch, but I simply couldn’t be bothered collecting the shared laptops for the students to use, so I worked with what we had and we made slowmotion videos instead. I incorporated Maths into the lesson too, so it covered a little bit more curriculum!

I connected my iPad to the projector so that I could give students a quick 45-second tutorial on how to use the iMotion app. I demonstrated how to create a maths-like video using an abacus which built bigger numbers the more photos I took and then I let the kids loose on the Maths resources in the classroom. Given that it was their first experience with the app, there were a few wobbly cameras, a few fingers in the way and the odd blurry photo, but you know, practice makes perfect!

Here’s some of the creations!


Posted in iPads, Learning, Technology

Slow-motion videos with 6 year olds

Last week I had the brainy idea of teaching my Prep/1 class how to make a slow motion video in our digital technology time. Why? It seemed like something that could be fun, looks at logical thinking and step-by-step processing, as well as integrating some teamwork!

To start, I modelled it. I chose 2 plastic animals from the toy tub, sat the kids in a circle around it and showed them what the iMotion app looked like on their iPad. I showed them how to press ‘New Movie’ and press the ‘finger’ button (for manual image capture, rather than on a timer) and then I asked each of them one at a time to move the little frog a tiny bit closer to the dinosaur. As each child moved the frog, I took a photo. After 15 photos, the frog was at the dinosaur! I talked about stopping – pressing the stop button TWO times, and then how to watch the video. The kids were so amazed that I could speed it up, or slow it down.

I let them go off in pairs, armed with an iPad to share and a range of toys to create scenes to capture. It had varying degrees of success, ranging from tantrums due to partner arguments to not being able to keep the camera still, stealing toys from other groups, or taking photos of our partner’s body as they moved the toys.

Yesterday, I came armed with 3 different mazes drawn on A4 paper. This time, they had to place an object at the ‘end’ of the maze and move another object from the ‘start’ to the ‘end’. Here’s what we got: (the last one is probably the most successful, but bear with me!)

Lessons learnt:

  • Think about some sort of tripod – some kids can’t comprehend the concept of keeping the camera still…fair enough, they’re only little!
  • When exporting the final product, make sure it’s at a speed that is easily viewable
  • Talk about not rushing the photos so that nobody’s arm/face/back/nostril is in the way
  • Explain how to turn the iPad up the right way, so the video isn’t upside down!

Not bad for our second attempt! Hopefully we’ll be able to use this knowledge to demonstrate how plants grow….or some sort of sustainability focus!

Posted in iPads, Learning, Technology

GAFE with 5-year-olds.

Yes, they can do it!

How? With your help.

This year, I am responsible for helping implement digital technology across the school, including in the Prep/1 classroom I teach in every afternoon. At the beginning of the year, all students from Years 2-10 were set up with their own Google account. After following Christine Pinto on Twitter for the last 12 months, I was fully convinced that students in Prep & Year 1 needed their own Google account too. We have 1:1 iPads, so I didn’t see how it could be a problem!

I asked our IT tech to set them up for me, and patiently waited. Within a week of the Prep/1 students having their own Google account, here’s what I did:

  • I placed all of the GAFE apps into a folder, and positioned it in the bottom bar of the iPad, for easy access. (Yes, I could have taught them how to do that, but at the start, I just needed to save myself some time. I’ll make sure I teach them how to create and move folders when the moment arises!)
  • I signed into Google Classroom for them (after school, the day before I needed it). (I am fully aware that this is not logistically possible for every teacher in every classroom. The class I’m talking about only has 13 students. But there are other ways around it – Year 6 Buddies to help, giving students their email address & password on a card, setting up keyboard shortcuts that inserts your school email address after the @ symbol…problem solve, you’ll get there!)

But how did I get the students to USE the GAFE apps? Well, the beauty of being 1:1 is that each student uses their iPad over & over, so they can stay signed in on the one device – no signing in and out constantly.

The first step was Google Classroom. I learnt from Alice Keeler & Christine Pinto that keeping your assignments numbered is a great way to keep track of them – and for students who can’t read yet. Despite many of them not yet being able to read properly, I still added written instructions for each assignment and I read them aloud for the students. I would ask them to look for the number 1 and press on the number. We would talk about the ‘plus’ button to add different things, like the ‘camera’ button to take a photo immediately, or the ‘mountain’ button to add a photo that we had taken earlier and was sitting in our camera roll.

A lot of the time, I add a Google Slide or Sheet to the assignment and allow it to create a copy for each student, so that each student would have the same template, but could input their own information. In Integrated Studies, we are looking at Friendship and the qualities of different people, so each student made an Introducing Me page in a collaborative Google Slide. They learnt how to find the slide with their name on it (all of the boys slides were green, all of the girls slides were orange), double tap in the text box, place the cursor after the words that were already there, and type their name, favourite colour and age. On the same slide, they learnt how to press the ‘plus’ button and take a photo, insert it and then use the ‘blue handles’ to change the size of their photo so that it wasn’t covering the text. We still had a few minutes left, so they also inserted a shape and changed the fill colour!

Introduce Me 1

Introduce Me 2

Yes, I use the proper vocabulary, most of the time. I talk about the flashing stick line being called the ‘cursor’ and the plus button being called ‘insert’. I talk about the writing that we do as ‘text’ and talk about the ‘text box’. I talk about Google Slides being the white app with the orange square being named ‘Google Slides’, so they’re getting a visual and a name to learn and relate it to.

They CAN do it! I use Google Classroom at least twice a week in my Prep/1 lessons (I’m only in there in the afternoons, and we also have Music, Library & Garden in my timeslots!), but my next step is to empower the other classroom teacher to use it more confidently. I have added her to the classroom and she can see everything that I post and that the kids submit, but so far, she’s just an observer!

I like to tell my colleagues that Google Classroom is another platform for collecting student work, without collecting piles of paper. One of the added benefits (believe me, there are HEAPS) is that students can submit more than just written work – my Prep/1 class have uploaded videos they’ve created using Explain Everything and Chatterpix, so they are learning oral language skills by recording and listening to their own voice.

My challenge is to integrate GAFE into each of our classrooms seamlessly, so that it’s not something ‘extra’ to use or facilitate, but that it becomes second nature to students and teachers!

Posted in iPads, Learning, Technology

Our Interschool STEM Day

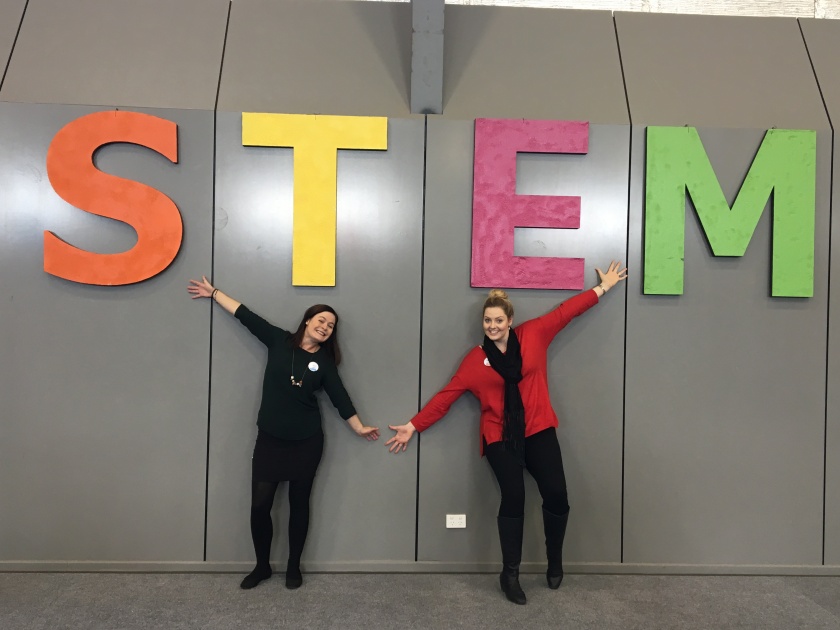
In 2016, two of my colleagues worked together to hold an Interschool STEM Day, to encourage local Year 6 students to work in teams to create a solution to a problem.

Using resources from the IET Faraday website, they adapted and orchestrated a mammoth day for the students to build a device to move one litre of water from the Stadium floor, into a bucket which sat on a platform. It was a challenge designed around pumps, water wheels and water pressure.

This year, one of my colleagues was on paternity leave, so I stepped in to help his teammate. Together, Jodie and I researched a new challenge for the day based around medical engineering – build a device to conduct a remote operation to pick up a ‘kidney’ and a ‘heart’ and place them in the correct place on the body.

We had 75 students from 12 different school register, 24 teams in total. The ideal team number was 3, however a few schools only had 4 Year 6 students in total, which we allowed. The stadium was set up with medical themed decorations, x-rays, lab coats, and medicinal charts. There were ‘Research Stations’, with laptops playing videos on loop with ideas and strategies that may give students inspiration. A hot glue gun station was set up, as was our STEM shop, where all of the building materials for the day were ready to be purchased by the teams.

The day started with a video about medical engineering to put the day into context, how operating theatres rely on robotics and other technology to assist them in procedures. Students were asked to sketch in their Challenge Workbooks a way to move an object from one place to another without physically touching it with their body. We introduced the ideas of forces – push/pull, levers, scoops, suction etc.

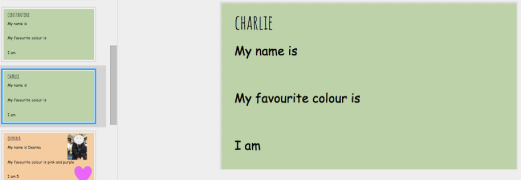
Each team was given a budget of $150 STEM dollars. They were required to plan their design, keeping their budget in mind. They were to assign roles to each group member and also create a ‘Learning Log’ using an assigned iPad, to create a documentary-style video of their manufacturing process.

Our school Kitchen Garden coordinator provided us with lunch and students received a small show bag with water and snacks for recess and their workbooks. We operated on a continual scoring system using Google Sheets so that both of us organisers could access to add scores and annotations throughout the day. Students received scores for their design briefs, their sketches, accuracy of their account balance ledger, effectiveness of their design and their teamwork skills.

After lunch, students packed up their tables and we sat down to perform 24 mock heart (ping pong ball) and kidney (ping pong ball) transplants. An iPad was placed above the operating table, where our cardboard cutout body and his foil tray organ chambers lay waiting. This iPad was to live-stream the action on the table, not just for the audience, but for the ‘surgeon’ operating the device. Just like in an operating theatre, the surgeon would be using the large screen to guide his actions while his vision to the cardboard body was blocked by a curtain.

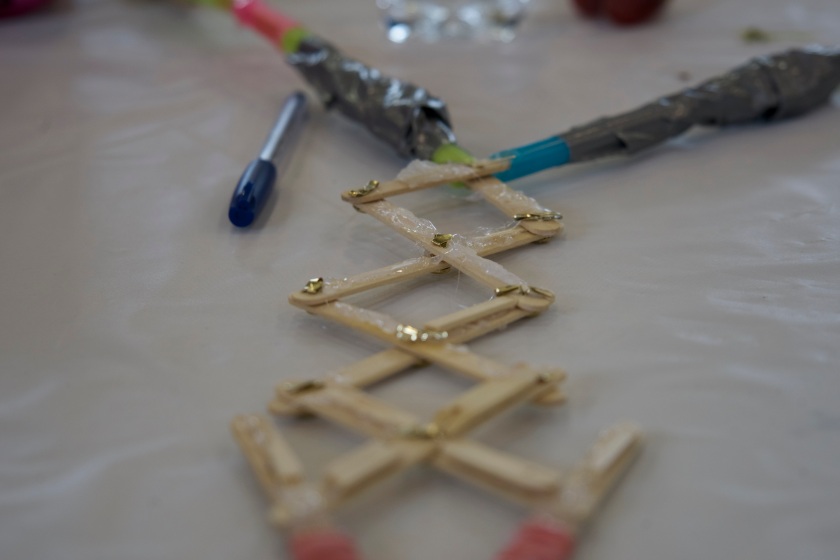
Students had to work around certain parameters – the device must be able to reach a distance of 50cm, it must be able to pick up and drop objects accurately and both heart and kidney must be transplanted in just 90 seconds – it’s life or death for our cardboard body!!

DSC00930

The winning team was gifted with a set of 6 Makey Makey kits to take back to their school to encourage creative and critical thinking to assist on their STEM journey!

There were many different designs – some more successful than others. There were many levels of teamwork and many different conversations that filled the stadium. The teachers who accompanied the teams from their school were pleased to see such collaboration and skill – not just for those students who excelled in the classroom.

Go Team STEM!

IMG_4131

Posted in iPads, Learning, Technology

Using iPads in Literacy Rotations

Many classrooms use the concept of Literacy Rotations in their classrooms, but struggle to find a way to keep each group engaged while they work with a focus group.

Below are some iPad-based ideas for Literacy Rotations, which of course you would use with a combination of non-iPad rotation activities, we know that just because you can do things on an iPad doesn’t mean it’s better!

  • ReadTheory – free to sign up, create classes and individual student logins. Students start with a pre-test to assess their initial reading level, by reading short passages and answering comprehension questions. By getting questions correct, students earn points and badges and teachers can consistently monitor progress. Fantastic for independent reading time. A colleague has been using this in her Year 8 English class and the students are loving it!
  • Pobble365 – free to use without an account, this website features a picture prompt for every day of the year, with a Story Starter for students to continue, or Question Time for students to answer questions about what they’ve just read. For independent Literacy Rotations, I would use either of these sections for the students to visit on their iPad – they could copy and paste the Story Starter into a Google Doc to continue writing, or create a Google Slide with their Question Time questions and answers. If students work in pairs, they could create an interview using the Camera app & iMovie, with one student being the interviewer and the other the interviewee.
  • Book Creator – there is a web version of this coming out soon, but the app works well for almost any subject! I loved using this in Literacy Rotations after the students had done a Guided Reading with the teacher to create a Book Quiz, for the other members of the group to answer. Students would take photos of the book, insert them into their book and then type their quiz question on the page. I then asked students to use the audio recording function to record the answer, so students completing the book quiz could find out the correct answer if needed. We often talked about Head, Heart & Hands comprehension questions to encourage more critical thinking. I also like the idea of creating an interactive dictionary using this app, by students recording words that are new to them, or really interesting words and using the audio function to record their definition, or explanation in their own words – plus images if they need! Other ways I’ve used Book Creator can be found here.
  • Popplet – I’ve used Popplet in so many different ways, from brainstorming character qualities, to spelling. I love Popplet as you students can use the pen function, insert images from the camera roll and export their finished Popplet. In my lower primary class, I use it to help segment words into their individual sounds.

IMG_4443

  • PicCollage – I used this for descriptive writing, in this blog post, but have also used it to create a collection of words that all start with the same letter, by taking photos, or looking for the same sound in magazines and newspapers.

This is just a tiny drop in the ocean of the multitude of different ways that you could integrate iPads in the Literacy block!

Posted in iPads, Learning, Technology

Book Creator ideas for lower primary

Let me preface this by saying these are not JUST for lower primary. Heck, you could use them anywhere, but the examples I’m including are from a lower primary perspective.

Story Journal:

I had an ASD student, who brought in his Zhu Zhu pet Zak and treated him like a class member during Term 1. This student HATED writing with pencil and paper and wasn’t overly fussed by using the iPad to write either. Enter the iPad camera and Book Creator. I told him that I thought it would be cool if Zak kept a diary of his adventures at school, so Zak could show all of his other Zhu Zhu pet friends…(bear with me, I know, it’s a bit funny that I was fully communicating with an inanimate object). To my joy, the student went for it and thus, this book was created. You’ll notice that the spelling isn’t correct – we were focusing on the sounds her could hear, rather than perfection, and these words became words we focused on spelling correctly later. You’ll notice that some of them aren’t even full sentences, but as he recorded himself speaking, he was experimenting with expression in his voice. Small steps for some, HUGE steps for this student.

Procedural Writing:

Like cookbooks, procedural texts are often better with photos. This same student (who still hated writing during Term 3) was reluctant to write a procedural text on how to make a Magnetic Fishing Game that all students had created in class. I instructed him to use Book Creator to get the job done, but typing was too much for him. He verbalised all of the wording direct to me while I typed – word for word (and he checked, his reading skills were fabulous). He took all of the photos by himself (except the ones where he featured – I was told exactly what to photograph!), to match the text on his page and then he recorded the audio for each page. This was emailed straight home to mum and dad – he was so proud and shared with the class in the afternoon.

Maths Journals:

This year with my Prep class, I am hoping to integrate technology more into authentic learning, rather than stand-alone lessons. Using Book Creator on the iPads, the task for the Preps will be to create a Nature Number Journal – by taking the iPads outside, creating all of the numbers to ten using natural materials, photographing it, recording the audio and writing the number, to reinforce correct number formation.

If you don’t already, follow Book Creator App on Twitter. They post great lesson ideas and resources!

Posted in iPads, Learning, Technology, Web 2.0

EdTechSA presentation

For all those who were at the @EdTechSA conference in Adelaide and were in my workshop, you’ll know we had some technical difficulties – ha, yes – at a technology conference.

EdTechSA 1

As we all know, flexibility is the key, so after 15 minutes of me talking with a blank screen, various cord changes, menu options, adapter swaps…we had lift off!

If you’d like the links to the resources I talked about in the presentation (ipad resources, apps and websites, please feel free to download the PDF version. You’ll notice that I’ve removed the videos and photos which had identifiable students in them – sorry, I don’t have permission to share them further than the conference.

Enjoy!
P.S. The lovely @JessOttewell actually filmed 11 minutes of my presentation – so if you want to experience some of it…you guessed it, jump on to Twitter, search for (and follow) Jess and you can see for yourself!